Pelican Lab
- Description
- Getting Started
- Lab Instructions
- Tips & Tricks
- Restrictions
- Recommendation
- Requirements
- Submission Instructions
- Collaboration
Description
The primary objective of this lab is for you to acquire the skills necessary to create a static page using Pelican, deploy it using GitHub pages, and learn to customize the basic themes by experimenting with CSS styling.
Getting Started
Clone the repository, change directory into the repo. Initialize a python3 virtual environment.
git clone {git-repo-url}
cd {git-clone-url}
virtualenv venv --python=python3
source venv/bin/activate
Install pelican, markdown and ghp-import.
pip install pelican markdown ghp-import
Run the pelican quick-start. Make sure you answer Y when it asks you about GitHub Pages!
pelican-quickstart

Welcome to pelican-quickstart v4.0.1.

This script will help you create a new Pelican-based website.

Please answer the following questions so this script can generate the files
needed by Pelican.


> Where do you want to create your new web site? [.]
> What will be the title of this web site? My Cool Site
> Who will be the author of this web site? Danger Doggo
> What will be the default language of this web site? [en]
> Do you want to specify a URL prefix? e.g., https://example.com   (Y/n) n
> Do you want to enable article pagination? (Y/n) Y
> How many articles per page do you want? [10]
> What is your time zone? [Europe/Paris] America/Edmonton
> Do you want to generate a tasks.py/Makefile to automate generation and publishing? (Y/n) Y
> Do you want to upload your website using FTP? (y/N) N
> Do you want to upload your website using SSH? (y/N) N
> Do you want to upload your website using Dropbox? (y/N) N
> Do you want to upload your website using S3? (y/N) N
> Do you want to upload your website using Rackspace Cloud Files? (y/N) N
> Do you want to upload your website using GitHub Pages? (y/N) Y
> Is this your personal page (username.github.io)? (y/N) N
Done. Your new project is available at /path/to/your/project
Lab Instructions
Phase One: Simple Pelican Site
Create your first Article
Create a file inside the content folder with some content. For example, you can use content/my-first-article.md with the following:
title: My First Article
date: 2019-01-07 8:00
category: Blog
authors: Your Name or Github Username or Some Alias
----

I like free static web hosting.
Enable Custom Themes for your Site
Make a directory called templates. Within this directory, create a new theme directory containing a templates folder and a static folder.
# On Ubuntu and macOS:
mkdir -p templates/mytheme/static
mkdir -p templates/mytheme/templates
On Windows you need to create the same structure.
Within the templates/mytheme/templates directory, create a new file base.html. Within the templates/mytheme/static directory, create a new file fancy.css.
touch templates/mytheme/templates/base.html
touch templates/mytheme/static/fancy.css
Add the following content to the file templates/mytheme/templates/base.html.
{% extends "!simple/base.html" %}

{% block head %}
{{ super() }}
    <link id="_stylesheet" rel="stylesheet" type="text/css" href="{{ SITEURL }}/theme/fancy.css" />
{% endblock %}
Modify the content of the templates/mytheme/static/fancy.css file to your preference. A quick sample stylesheet can be found below.
html, body {
    margin: 0;
    border: 0;
    font-size: 100%;
    background-color: #000000;
    color: #ffffff;
}
This is just to get you started, you will have to add a lot to fancy.css later!
Add your theme to your pelicanconf.py file.
THEME = 'templates/mytheme'
In publishconf.py, Comment out CATEGORY_FEED_ATOM.
Generate and preview your site
For Mac And Ubuntu:
make devserver should work if you have make installed and the virtual environment activated.
For Windows:
pelican content
pelican --listen
Your site should now be available at http://localhost:8000.
For Ubuntu on Windows (WSL):
Get your Ubuntu VM's IP address using the ip addr show dev eth0 command on Ubuntu. It will be something similar to 172.19.46.249.
Use make devserver-global on Ubuntu. Then you can point your browser at http://yourubuntuvmsipaddress:8000, for example http://172.19.46.249:8000.
Prepare your Pelican Site for GitHub Pages
Update publishconf.py and set SITEURL to your GitHub given URL.
SITEURL = 'https://uofa-cmput404.github.io/your-repository-name'
So if your GitHub repo was f24-d01-d02-labsignment-pelican-hazelcam, you'd put:
SITEURL = 'https://uofa-cmput404.github.io/f24-d01-d02-labsignment-pelican-hazelcam'
You need to disable GitHub's built-in static site generator, Jekyll.
Jekyll is a static site generator like Pelican, except that it's written in Ruby.
However, sometimes it can conflict with Pelican. In order to disable it, you need to have Pelican produce a file called .nojekyll.
You can do that by creating a page with Pelican in the content/pages folder (create it if it doesn't exist). You could call it something like content/pages/nojekyll.md.
title: Disables Jekyll
status: hidden
url: .nojekyll
save_as: .nojekyll
----

This file just disables Jekyll
Run make html (macOS or Ubuntu) or pelican content -o output -s pelicanconf.py (Windows or if you don't have make).
Check the output directory: it should contain a file called .nojekyll.
Make sure to not commit the output directory to your GitHub: add it to your .gitignore. ghp-import will commit it later as a separate branch.
Enable GitHub Pages on GitHub
Create a branch in your GitHub repo called pages.
Enable GitHub Pages for your repo. It is in the repo settings under pages, then select "Deploy from a branch". Select your "pages" branch. For more information, see GitHub's Documentation.
Deploy from macOS or Ubuntu
- Set your pages branch name in
Makefile: setGITHUB_PAGES_BRANCH=pagesso that ghp-import doesn't overwrite yourmainbranch. - Deploy using
make github. - If you get ghp-import error. Install ghp-import to your virtual environment using pip. (
pip install ghp-import)
Deploy from Windows or Without Make
Make sure to include the -b pages to specify your pages branch so that ghp-import doesn't overwrite your main branch.
pelican content -o output -s publishconf.py
ghp-import output -b pages
git push origin pages
When building for GitHub: you should use publishconf.py not pelicanconf.py. That is what it is there for: so you can have different settings for local development and for publishing to anywhere (including GitHub Pages).
Check your GitHub Pages site
Your GitHub Pages site should be at a URL like https://uofa-cmput404.github.io/GITHUB REPO NAME/ a couple of minutes after pushing.
For example: https://uofa-cmput404.github.io/w24-h01-labsignment-pelican-hazelybell/.
Phase Two: Add content to your site
Create 3 more articles for your site from 3 project Gutenberg books of your choosing. You can directly download the HTML file from the website.
The Project Gutenberg HTML files contain HTML for a full webpage.
Your Pelican articles should only include the necessary HTML format the contents of your books correctly.
For example, the Project Gutenberg pages contain the <head> element for a webpage, but Pelican will generate its own <head> element from its Jinja HTML templates. In Pelican, the <head> is used to provide metadata.
So, you should replace the <head> element in your Pelican articles with one that provides the metadata Pelican is looking for.
Make sure to remove all unnecessary HTML from the Project Gutenberg HTML.
You should also add the metadata for Pelican similar to how you did for your first article above. Also, be sure to cite where you got your book from: the Project Gutenberg.
For example, if you chose Moby Dick you could make your content/moby-dick.html look like this:
<html>
        <head>
                <title>Moby Dick</title>
                <meta name="tags" content="novel" />
                <meta name="date" content="2024-02-04" />
                <meta name="modified" content="2024-02-04" />
                <meta name="category" content="books" />
                <meta name="authors" content="Herman Melville" />
                <meta name="summary" content="The Project Gutenberg eBook of Moby Dick; Or, The Whale" />
        </head>
        <body>
            <p class="source">This is a copy of <a href="https://www.gutenberg.org/cache/epub/2701/pg2701-images.html">Moby Dick from the Project Gutenberg Website</a>, as of 2024-02-04. This ebook is for the use of anyone anywhere in the United States and most other parts of the world at no cost and with almost no restrictions whatsoever. You may copy it, give it away or re-use it under the terms of the Project Gutenberg License included with this ebook or online at www.gutenberg.org. If you are not located in the United States, you will have to check the laws of the country where you are located before using this eBook.
            </p>
            <h1>
                    MOBY-DICK;<br>
                    or, THE WHALE.<br>
            </h1>
            ... a lot more HTML ...
        </body>
</html>
Notice that I removed the original webpages <head> in the example above and replaced it with one suitable for Pelican. For more information about how to write Pelican articles, see their documentation.
Commit and push your books to GitHub: check that they are working correctly.
Compare the output HTML from Pelican with that of the HTML you wrote for your books. Pelican should have added a lot more HTML around
the HTML you put in your <body>.
You can add images using attach, as described in the pelican documentation: https://docs.getpelican.com/en/latest/content.html#attaching-static-files
Phase Three: Playing around with CSS
Write CSS to enable your site to have fancy mode, 90s mode, minimal mode, and responsiveness in both desktop and mobile views.
- Fancy Mode: You can take inspiration from modern websites such as Amazon, Facebook, Google, GitHub, or Microsoft, but do not copy their code.
- These websites have thousands of lines copyrighted CSS that you do not need and do not have permission from Amazon/Facebook/Google to copy. However, you can use your browser's Dev Tools to see how they accomplish certain things and take inspiration from that.
- Try to make your fancy mode look like a standard, modern website. Try to make it look like a website that you would want to use.
- 90s Mode: You can take inspiration from the oatmeal comic or space jam. Try to make it like those 90s websites.
- Minimal Mode: Try to make the page look good and clean for printing. Use a minimalism-style design. Minimalism is about removing any unnecessary elements of the design such as lines, colours, shapes, and backgrounds.
- Try to make your print mode look good for printing. Check what it looks like by printing it to a PDF file (you don't need to print it to physical paper).
- Every part of the page should be very different between the 3 modes.
- You should include CSS that styles every visible HTML element on the pages.
- You should NOT include CSS that styles elements which your page does not have.
- Include some changes that make your site uniquely yours. For example: your favourite colour, your favourite fonts, etc.
You should use 3 JavaScript buttons to switch between these. For example, inside your /templates/mytheme/templates/base.html you can add the following inside {% block head %}.
This doesn't necessarily have to go inside {% block head %}, you could for example put it outside {% block head %} to have it always show up, or inside a different block. But for the snippet to make it into the rendered page, you have to make sure that child (more specific templates like article.html,index.html, etc.) don't overwrite the block.
See template inheritance documentation for more details: https://jinja.palletsprojects.com/en/3.0.x/templates/#template-inheritance
        <button onclick="changeStylesheet('fancy.css')">fancy mode</button>
        <button onclick="changeStylesheet('minimal.css')">minimal mode</button>
        <button onclick="changeStylesheet('90s.css')">90s mode</button>

        <script>
        const stylesheetRegex = /[^/]*\.css$/

        function changeStylesheet(style){
                let element = document.getElementById("_stylesheet")
                element.setAttribute("href", element.getAttribute("href").replace(stylesheetRegex, style))
        }
        </script>
Then create the corresponding CSS files:
templates/mytheme/static/minimal.csstemplates/mytheme/static/90s.css
templates/mytheme/static/fancy.css Should already exist from earlier. Clicking on one of the buttons will replace the stylesheet with the one corresponding with each mode.
CSS Requirements
The 3 css files aren't allowed to share any code. To be on the safe side, you can create each style from scratch to produce 3 unique sets of styling rules for your site.
Each of the three styles should have differences in the following ways. The differences should be large, obvious, and visible. It should be difficult to tell that they're the same HTML at all! You should not need to explain how your three CSS styles are different, because it should be obvious by looking at the results in a browser.
- 3 different layouts
- For example, if the navigation menu is at the top of the page, it should NOT be at the top in the other two versions!
- 3 different sets of fonts
- 3 different ways of styling the text
- 3 different ways of making headings stand out from the rest of the text
- 3 different ways of making links stand out from the rest of the text
- Links for different purposes (e.g. menu links vs links in the content) should be styled differently
- 3 different ways of separating paragraphs
- ...
- 3 different ways of organizing navigation links
- 3 different colour schemes
- 3 different sets of images
- These could be logos, decorations, backgrounds, borders, horizontal rules, icons, emojis...
- Not including the images that came from Gutenberg (although these should be styled with CSS)
- 3 different kinds of borders
- 3 different backgrounds
- Make them as different as possible. Three different colours is not different enough. Try different kinds of images, gradients, animations...
- 3 different sets of margins & paddings & sizes
- 3 different ways of using vertical & horizontal alignments
- 3 different sets of effects (gradients, opacity/transparencies, floating elements, absolute elements...)
- 3 different ways of including some changes that make your site uniquely yours. For example: your favourite colour, your favourite fonts, etc.
- 1 layout should use
flexboxto change the layout- See the MDN guide on how to use Flexbox
- Every visible HTML element should be customized by your CSS in some way
- Every element class should be styled. For example: the
sourceclass in the HTML above.
- Every element class should be styled. For example: the
- Do not include CSS for elements that your page does not have!
- Additionally, use media queries to apply different styling for different screen sizes. Here is an example:
/* Extra small devices (phones, 600px and down) */
@media only screen and (max-width: 600px) {
    /* Add styling here */
}

/* Small devices (portrait tablets and large phones, 600px and up) */
@media only screen and (min-width: 600px) {
     /* Add styling here */
}

/* Medium devices (landscape tablets, 768px and up) */
@media only screen and (min-width: 768px) {
     /* Add styling here */
}

/* Large devices (laptops/desktops, 992px and up) */
@media only screen and (min-width: 992px) {
     /* Add styling here */
}

/* Extra large devices (large laptops and desktops, 1200px and up) */
@media only screen and (min-width: 1200px) {
     /* Add styling here */
}
You can read more about CSS and Media Queries here
Testing it on the Browser
Firefox is the standard for marking in this class, so it's a good idea to test your site using Firefox.
Click on the different buttons to test out each mode.
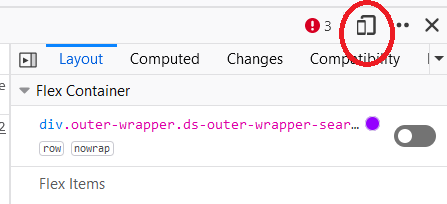
You should also try simulating various devices with different displays to make sure your website is "responsive." Both browsers have a button
to enable device simulation mode. Firefox's button looks like a phone in front of a tablet.
You can change to Desktop and mobile view by click on this button.
Tips & Tricks
In this assignment you will be evaluated on how well you followed the 'spirit' of the assignment as well as the technical implementation.
To be specific, the spirit of the assignment is to have you express yourself in a creative way across the 3 themes/modes. We want to see your vision for a modern/fancy website, a minimalist website, and a throwback to retro 90s websites.
You should be proud of each mode, and leverage CSS in combination with your creativity to make each shine. Each should be a unique experience (more on this later).
You can break the CSS requirements listed above in order deliver on your ideas. Conversly, you can follow the CSS requirements perfectly and fail to recieve full marks if it seems like you tried to make as few changes between modes as possible.
Different layouts arise from different user experiences
So how can you be sure you'll get full marks for having 3 different layouts/styles if following the CSS requirements isn't enough?
The answer is to construct different user experiences. Once you have the Gutenberg content displaying with no CSS on your website, stop. The temptation for your first mode will be to 'make it look fancy/minimal/90s', this is a trap.
The temptation for your first mode will be to 'make it look fancy/minimal/90s', this is a trap.
Instead take some time and think about the content. They are books. Maybe you picked the books according to some theme. How might a user want to interact with this content?
Fancy Mode
In a fancy mode for example, inspire yourself from modern ebook websites like this one or this one. Think about your own experiences visiting libraries or book shops.
Now think about how you can translate elements of those experiences to your fancy mode. In book shops for example, book covers are displayed prominently, this could translate into a grid view with the book cover images from project Gutenberg displayed. The grid can then be styled to look like a shelf. When you hover over one of the books maybe the book expands and drops a shadow to feel like you're picking it up off the shelf.
When you've clicked on a specific book, you are now looking to build a reading experience.
What does it feels like to sit and read your favourite book indoors on a rainy day?
Maybe you could style the background image to be raindrops against a window. The content of the book itself could be styled to look as if it is paper.
What kind of features would you want while you're reading? Perhaps it would be useful if the table of contents was always displayed as a sidebar that stuck with you as your scrolled down the page, allowing you easy access to different chapters.
Modify the HTML
You will likely struggle to realize your ideas if you do not make modifications to the HTML as well as the CSS.
Consider the shelf idea from the fancy mode section. The way articles are displayed by default won't allow you to place the book covers on your index page. To change this you'll have to modify the index.html template.
Take a look at how other pelican theme developers did this, here is a huge collection of pelican themes to learn from.
Let's see how the simple-bootstrap theme modifies its index.html:
{% extends "base.html" %}

{% block navclass %}active{%endblock%}

{% block content %}
<section id="content" class="content">
    {% block content_title %}

    {% endblock %}

    {% for article in articles_page.object_list %}
            <article class="hentry">
                    <header>
                        <h2 class="entry-title">
                            <a href="{{ SITEURL }}/{{ article.url }}" rel="bookmark" title="Permalink to {{ article.title|striptags }}">{{ article.title }}</a>
                            </h2>
                    </header>
                    <div class="entry-content"> {{ article.summary }} </div>
                    <!-- entry-content -->
            </article>
    {% endfor %}

    {% include 'pagination.html' %}
</section><!-- content -->

{% endblock content %}
Notice how they've made a custom definition for the how the articles are diplayed on the index page. It is there where you're going to want to insert the book cover image if you were to attempt implementing the fancy mode idea. You could add a metadata field to the article that contains the path to the cover image, and then use an <img> tag to display it in the index.html template.
Avoid Variations
As mentioned before:
The temptation for your first mode will be to 'make it look fancy/minimal/90s', this is a trap.
It is a trap because after you do it, you're going to be tempted to take the one mode you've made, and just 'tweak' it to create the other 2.
The following 4 screenshots all show the same layout. A student submitting the modes below would recieve points for only 1 layout.


Similarily, these following screenshots also contain only a single layout.


All this is to say, small adjustments, even if they satisfy the CSS restrictions are not a good way to get all possible marks for this assignment. If you find yourself arguing that technically X makes it a different layout, you're unlikely to get credit for making a different layout.
Examples from past Cmput404 students
A collection of examples from students who got high grades on this labsignment. Click on each sample to switch between fancy, minimal and 90s mode.


Restrictions
Violation of the restrictions will result in a mark of zero.
- Must use Python3
- Using of any frontend frameworks, CSS libraries, JS libraries or frameworks is forbidden.
- You must write plain CSS and HTML.
- The only allowed use of JS is to switch between your three stylesheets.
- You must not use JS for fonts, decorations, transitions, animations, images, colors, layout, sizing, margins, padding, alignmens, borders, backgrounds, effects, gradients, transparencies, positions, ...
- You may not use CSS libraries or frameworks. For example: Tailwind, Bootstrap, Materialize, Bulma, Foundation, UIkit. However, just because it's not on this list does not mean it is allowed: there are 100s of examples.
- You may not use CSS preprocessors or transpilers. For example: Sass, Stylus, Less, PostCSS, ...
- You must not use frontend frameworks, HTML frameworks, HTML libraries, etc. such as React, Vue, Angular, jQuery, lodash, handlebars...
- The only allowed HTML processor is Jinja: see the next point.
- You may customize the Pelican Theme's Jinja templates if you want to change the HTML produced by Pelican, but Pelican must produce plain HTML. In this situation, the Jinja templates are your "framework," which is allowed.
- If you borrow CSS from examples online, always cite the author, give the source URL, and the date you downloaded it.
Recommendation
- Go look at CSS on the internet. Check the licenses.
- Look how things are achieved.
Requirements
- A functioning Pelican site
- featuring four articles
- with completely and totally different styling in fancy mode, minimal mode, and 90s mode
- See the CSS Requirements above!
- responsive in both mobile and desktop views
- deployed on GitHub Pages.
- A git repository with a
mainorsrcbranch that does not contain built (compiled, transpiled, bundled) or downloaded artifacts, including but not limited to:virtualenvvenvetc..pycfiles,__pycache__directories.node_modules- Folders like
outputor any other output HTML produced by Pelican.
- A git repository with a
pagesbranch that is the source of the GitHub pages website.- This contains the output HTML produced by Pelican.
- Your site should look the same on GitHub pages as it does on your local dev server.
Submission Instructions
Make sure you push to GitHub classroom BEFORE 4PM on Monday! You will not be able to push after that!
Submit a link to your repo in the form https://github.com/uofa-cmput404/s25-labsignment-django-yourgithubname/commit/bunch-of-numbers on eClass. Do not submit a link to a branch, a file, or the clone URL.
If you do not submit a link to your COMMIT on Canvas on time using the correct format above, you will get a zero.
You can submit and then resubmit as many times as you want before the deadline, so submit early and often.
Collaboration
- You may consult with others (exchange high-level ideas) but the submission should be your own source code.
- Collaboration must be documented in your source code.
- Any source code you got from anywhere else must be cited in the source code. This includes code from LLMs.
- You can only use source code that you understand: see the lab marking info
- For more information see the collaboration section in the outline: [{filename}/general/outline.md#consultation-assignments-labs]